SCCM OSD log details at Winpe.

SMSPXE.log – PXE Boot log file recorded on server.

1

Once the PXE Boot Done it will come up in WinPE so we can see press F8 .

Wpeinit.log : X:\Windows\System32\wpeinit.log :  it will show you the DNCP details and temporary machine name and other relevant information.

Winpeshl.ini : Notepad.exe X:\Windows\System32\winpeshl.ini : it will show you the customsetting.in it says Task sequence boot shell.

Now we can see the Cmtrace.exe %temp%\SMSTSLog\SMSTS.log file will show you everything till TSBootShell.

Now you can see the Disk partition details.

Now once you will see the apply the Operating system image you can see c drive and file started copying in that particular partition.

To open the unattend.xml file on Win PE

You can put these command line to pause the Task sequence.

If you delete the file DisableCMDRequest.TAG it will allow you to open Command prompt after WinPE Shift+F10

Netsetup.log file give you information about the domain join

SCCM : Dell Driver Automation via SCCM

1)We need to create a package with batch file with below statement.

start /wait “C:\Program Files (x86)\Dell\CommandUpdate\dcu-cli.exe” /import /policy C:\ProgramData\Dell\CommandUpdate\MySettings.xml
if %ERRORLEVEL% == 0 goto RUNDCU
else goto QUITTASK
RUNDCU
“C:\Program Files (x86)\Dell\CommandUpdate\dcu-cli.exe” /log C:\ProgramData\Dell\DCU.log
/silent
:QUITTASK
exit /b %ERRORLEVEL%

2) Create an XML file with below detail

3) Create a Package with standard program and select the RunDCU_2x.cmd in the command line and deploy it .


SCCM : To fix the upgrade issue from 1802 to 1810 CB

How to troubleshoot while getting issue on upgrade of SCCM CB.

Some times we saw upgrade stuck on Downloading below is the step I mentioned in order to fix this issue.

1)To fix this you can reset the particular package GUID running CMUpdateReset.exe

2) You can start the SQL Management studio and run this query command line and select the all Package GUID together and delete it.

SELECT * FROM CM_CAS.dbo.CM_UpdatePackages
where PackageGuid=’454B3508-4387-4106-9441-283495DEC3EC’ or PackageGuid=’f420d72a-4a0b-40b2-b4d8-275489cc32d0′ or PackageGuid=’6c34f799-8ab9-46e4-a9c6-ff3e84c64829′;

DELETE FROM CM_CAS.dbo.CM_UpdatePackages
where PackageGuid=’454B3508-4387-4106-9441-283495DEC3EC’ or PackageGuid=’f420d72a-4a0b-40b2-b4d8-275489cc32d0′ or PackageGuid=’6c34f799-8ab9-46e4-a9c6-ff3e84c64829′;

3) Restart the SMS_Executive Service and Check the DMPDownloader.log file .

4) Open SCCM Console and see the status. If the issue is Failed to Extract the payload cab of package

You need to check the permission of the Easysetuppayload permission and the network path permission.

I believe this is helpful to fix the upgrade issue on SCCM.

Dell Driver Through Task sequence and DISM command line SCCM 1810


Deploy Precision 3530 Windows 10 Driver Pack from SCCM

In this article we will download the Dell Driver from Online and Make package and Deploy through the Task Sequence.

Download the cab file from Dell Website from Deploy Dell Precision 3530 Windows 10 Driver Pack link below

https://www.dell.com/support/home/uk/en/ukbsdt1/drivers/driversdetails?driverid=r61wv

Now we should extract the cab file and put in Shared network location

Now we will create the package for Dell driver and Distribute the same for DP.

Step 1. Go to Software Library >Click on Software >Package>Create new package

Step 2. Name the application select the Network location and click Next

Step 3. Select Do not create program and click Next.

Step 4 Click Next on the summary and finished.

Step 5. once the package ready we should distribute it to DP and Create the TS Steps for Dell OEM Drivers.

Step 6. ADD the DISM Command line and Select the relevant package and Click on Option on the other tab.

Step 7. On this last step we will set the WMI query for this particular Model and Apply this .

Hope this will help someone to make the driver and apply through Task Sequence.

Dell BIOS Configuration update with SCCM and Dell Command Tool

In this post, We will see how to update BIOS setting for all model Dell laptops.

We will user Dell Command line configuration to extract the required change in the BIOS and we will make a package and then we will make a custom Task sequence to deploy and test the same.

First install the Dell Command Configure tool locally and then select Multi platform package

Screenshot_3

Here we will change two settings for Dell BIOS Configuration

Screenshot_5Screenshot_4

Now Click on Export Config and save it.Screenshot_6

Once you save the new configuration you can see in the Html file also from the saved location.

Screenshot_2

Screenshot_15

Once you save your configuration, navigate to “C:\Program Files (x86)\Dell\Command Configure” and copy the contents of the folder “X86_64” to a location SCCM can access. You will be importing the directory to which you copy these files as a package in SCCM.

Screenshot_1

Now we will make package for BIOS Configuration and Do not create a program and Distribute it after that.

Screenshot_7

Select Do not create Program and Click on Next

Screenshot_8

Now Distribute the BIOS Configuration Package

Screenshot_9

Now we will create the Custom Task sequence and we will add the configuration and Command line there.

Screenshot_10

Add>General Run Command line HAPI\HAPIInstall.bat and select the package.

Screenshot_11

Step 2. Add the Clear BIOS password and attach the package also.

Screenshot_12

Step 3. CCTK BIOS Configuration Dell Model and Add Command line for that and attach package also.

Screenshot_13

Step 4. In the end we will set the BIOS password back to the Dell model .

Screenshot_14

This is the process to Change the BIOS Configuration from Dell Command line and SCCM TS. Hope this will help someone to understand.

SCCM 1806 CB- To Set the Task Sequence Status Message Query.

Task Sequence Status Message query.

Screenshot_7

select stat.*, ins.*, att1.*, stat.Time from SMS_StatusMessage as stat left join SMS_StatMsgInsStrings as ins on stat.RecordID = ins.RecordID left join SMS_StatMsgAttributes as att1 on stat.RecordID = att1.RecordID where stat.Component = “Task Sequence Engine” and stat.Time >= ##PRM:SMS_StatusMessage.Time## order by stat.Time desc

Screenshot_4

select stat.*, ins.*, att1.*, stat.Time from SMS_StatusMessage as stat left join SMS_StatMsgInsStrings as ins on stat.RecordID = ins.RecordID left join SMS_StatMsgAttributes as att1 on stat.RecordID = att1.RecordID where stat.Component = “Task Sequence Engine” and stat.MessageID = “11140” and stat.Time >= ##PRM:SMS_StatusMessage.Time## order by stat.Time desc

Screenshot_5


select stat.*, ins.*, att1.*, stat.Time from SMS_StatusMessage as stat left join SMS_StatMsgInsStrings as ins on stat.RecordID = ins.RecordID left join SMS_StatMsgAttributes as att1 on stat.RecordID = att1.RecordID where stat.Component = “Task Sequence Engine” and stat.MessageID = “11141” and stat.Time >= ##PRM:SMS_StatusMessage.Time## order by stat.Time desc

Screenshot_6

SCCM 1806 CB- Pause Message in the Task Sequence.

Within the Task sequence put the Pause message you can use the below powershell command line inĀ  the task sequence .

powershell.exe -command (new-object -ComObject Microsoft.SMS.TsProgressUI).CloseProgressDialog() ; (new-object -ComObject wscript.shell).Popup(‘Hey!! They Task Sequence is Paused to Dig into Logs! Just Click OK to Continue.Thanks Gaurav Raj!!.’,0,’Message Box Title in Upper Left’,0x0 + 0x30) ; Exit 0

Screenshot_1

Message will display like this on every step in the task sequence.

Screenshot_3


SCCM 1806 -Operating System Deployment Scenario!!

Today we will note down three Operating system Deployment Scenario which we need to note down while doing the OSD Deployment
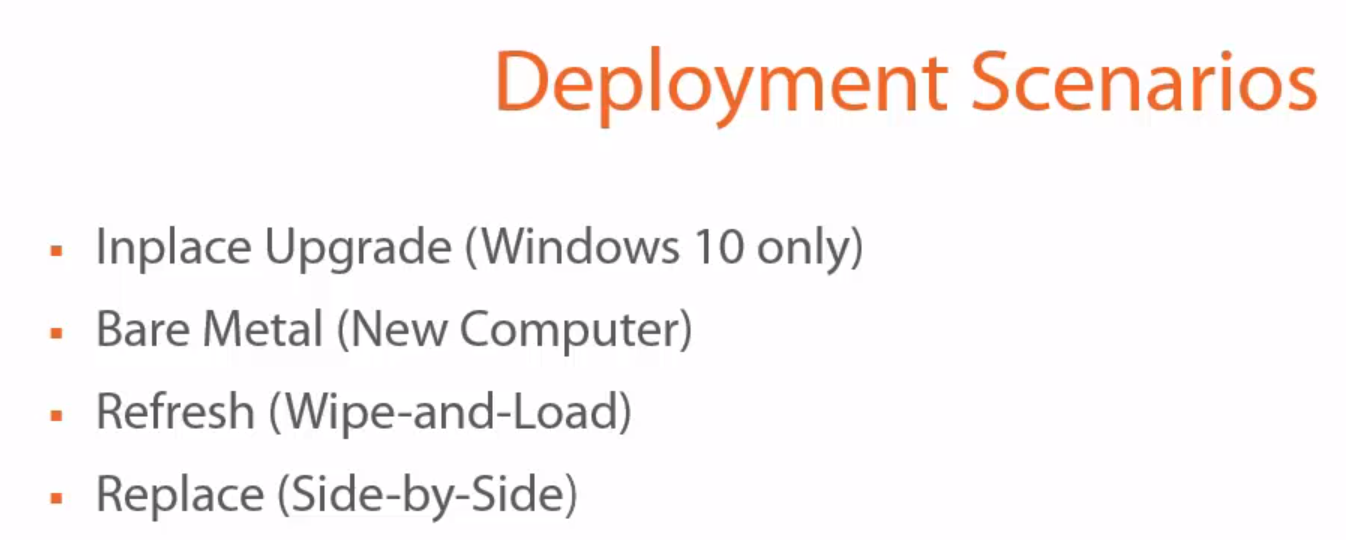
Screenshot_1

InPlace Upgrade (Windows 10 Only) :Ā The installation of an operating system or application on the computer without removing the older version first and without saving any data beyond normal precautions.

Bare Metal :Ā AĀ bare metalĀ environment is a computer system or network in which a virtual machine is installed directly on hardware rather than within the host operating system (OS). The term “bare metal” refers to a hard disk, the usual medium on which a computer’s OS is installed.

Refresh OS Deployment :A refresh is sometimes called wipe-and-load. The process is normally initiated in the running operating system. User data and settings are backed up and restored later as part of the deployment process. The target can be the same as for the new computer scenario

Replace OS Deployment :Ā A computer replace is similar to the refresh scenario. However, since we are replacing the machine, we divide this scenario into two main tasks: backup of the old client and bare-metal deployment of the new client. As with the refresh scenario, user data and settings are backed up and restored.

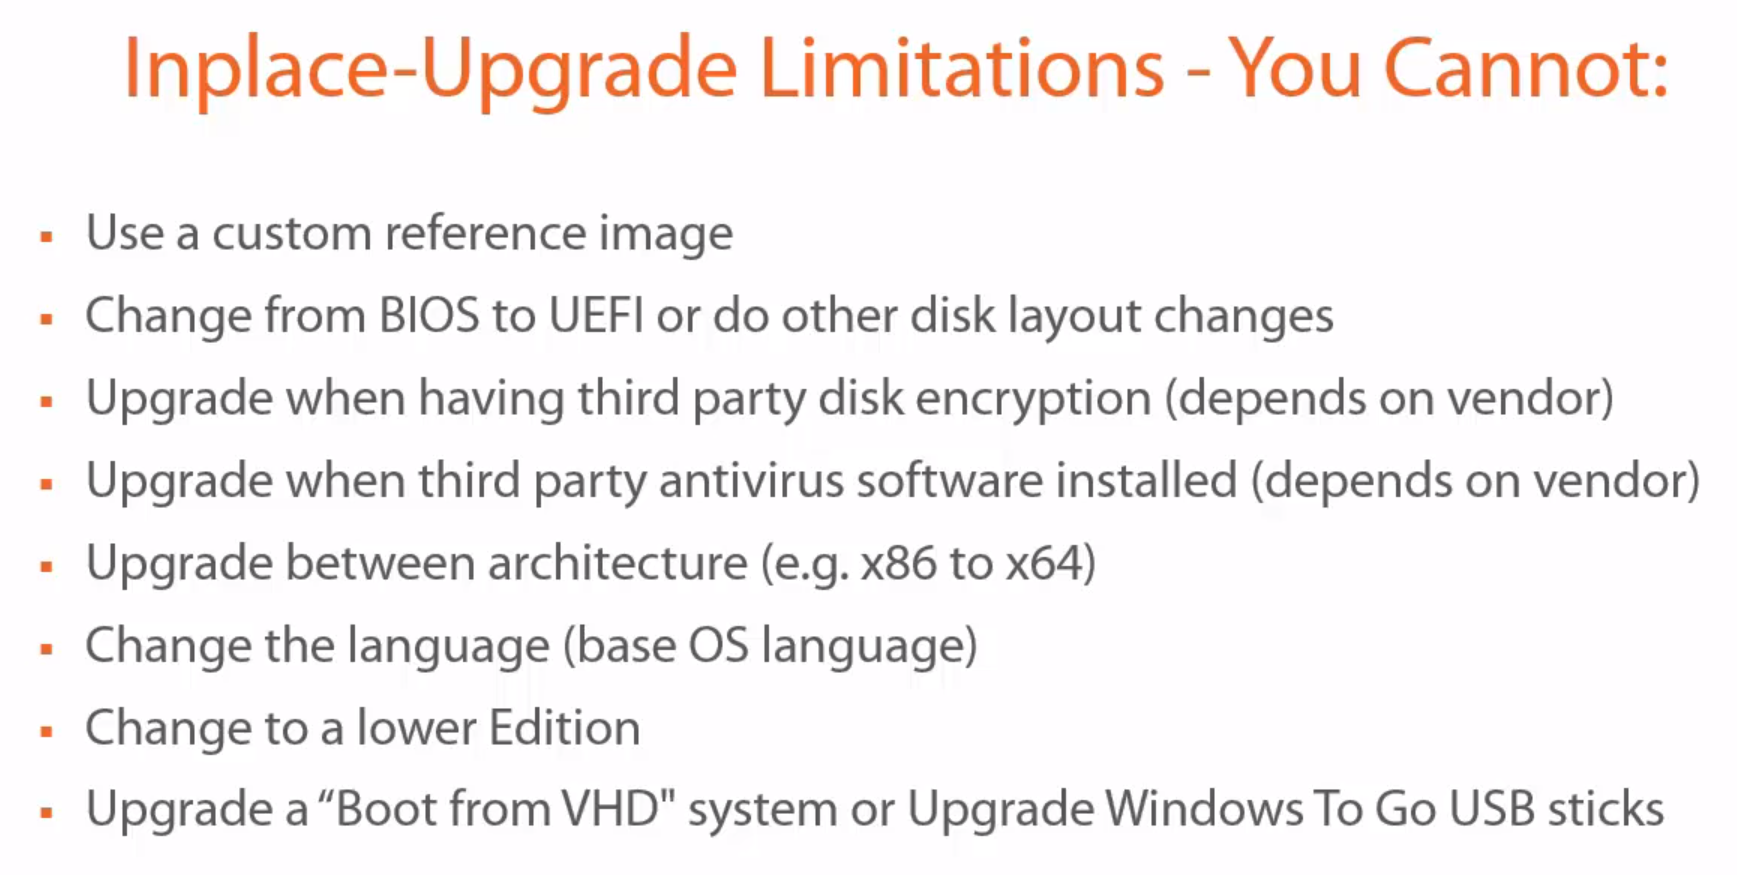
IN Place Update Limitations You cannot do these below.

Screenshot_2

Now we will see the Deployment Methods ,There are three kind of deployment methods

Screenshot_3

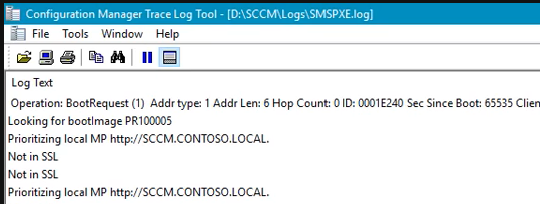
PXE initiated deployments: PXE-initiated deployments let client computers request a deployment over the network. In this method of deployment, the operating system image and a Windows PE boot image are sent to a distribution point that is configured to accept PXE boot requests.

Bootable media deployments: Bootable media deployments let you deploy the operating system when the destination computer starts. When the destination computer starts, it retrieves the task sequence, the operating system image, and any other required content from the network. Because that content is not included on the media, you can update the content without having to re-create the media.

Stand-alone media deployments: Stand-alone media deployments let you deploy operating systems in the following conditions:

  • In environments where it is not practical to copy an operating system image or other large packages over the network.

  • In environments without network connectivity or low bandwidth network connectivity.

SCCM 2012 Current Branch -MDT CustomSettings.INI Settings

Below is the setting for CustomSettings.iniĀ  you can do for Customize the UDI Wizard and Serial Number.


[Settings]
Priority=Init,ByVirtual,Virtual-True,Default
Properties=MyCustomProperty,SNum,ComputerTypeName

[Init]
SNum=#Left(“%SerialNumber%”,4)#

[ByVirtual]
Subsection=Virtual-%IsVM%

[Virtual-True]
ComputerTypeName=VM

[Default]
OSInstall=Y
SkipCapture=YES
SkipAdminPassword=NO
SkipProductKey=YES
OSDDiskPart=TRUE
OSDDomainName=
OSDDomainOUName=OU=Clients,OU=Computers,OU=ARAJ,DC=test,DC=local
OSDJoinAccount=
OSDJoinPassword=Password
UserLocale=en-us
UILanguage=en-IN
KeyboardLocale=4009:00004009
OSDComputerName=%ComputerTypeName%-%SNum%